With the subfloor built and insulated, the next step was to install the SIPs (structural insulated panels). ‘SIP’ is a term that is thrown around a lot in green building, energy conservation and the tiny house movement, so it will serve us well to take some time and describe them a little more here.
A SIP is an insulated foam core, sandwiched between two structural facings- typically panels of OSB (oriented strand board). SIPs replace the typical ‘stick’ framing method of using 2″ x 4″ boards and then insulating with fiberglass. SIPs can be ordered in virtually any size, are pre-insulated (foam core) and can have channels pre-cut for all electrical needs before they are delivered to your site, in theory savings tons in labor costs. In our case, we are doing our own labor at the expense of blisters and bruises, but it is a convenience factor of needing to do less on-site labor- especially less on-site skilled labor. Kalib has skills for days and expertly modified panels as needed, but for myself, framing out a wall compared to basically leaning a panel upright where it’s supposed to go, would be painstaking.
Allow us to geek out here. The main benefits of using SIPs are actually seen in the the long-term. In most homes, heating and cooling accounts for about 50% of all energy use. So when you hear something like R-19 or R-30, they are referring to
the R-value, which is a number assigned to how well a material provides thermal resistance. A material with a higher “R-value” means it provides a more effective thermal barrier between the inside and outside of a home. An R-value will quickly diminish as opportunities for conduction and convection increase.
Conduction is how much heat is transferred through a solid object, such as a through an exterior wall of your home. Insulation is meant to prevent this. Convection is the transfer of air between non-solid things such as gaps in your walls or roof. Overtime, vapor and moisture will breakdown lumber and insulation.
SIPs are very rigid and can be designed in panels as large as 8′ x 24′, inherently creating large expanses where opportunities for conduction and convection are greatly reduced compared to traditional framing. The problem with traditional framing is that the lumber itself allows for a lot of conduction and the fiberglass insulation inevitably doesn’t reach every nook and cranny allowing for more convection than planned. Every piece of lumber (imagine studs every 18″-24″) creates what are called “thermal bridges” that basically act as paths for heat to move between the home interior and exterior. For example a 2″ × 6″ wall with R-19 fiberglass insulation turns out to be R-13.7 when the thermal bridging of studs every 24 inches is considered. By using an entirely insulated panel that only uses lumber to connect to other panels, the opportunity for thermal bridging is greatly reduced.
Okay now that you’ve been schooled on SIPs, the fun part is installing the SIPs. Here is how it worked. Kalib found tiny house plans, he bought these. He began pricing out what the plans called for. With a bid in hand of just over $11k for the custom windows and door the plans called for, he knew he could do better.
Kalib’s previous life as a general contractor in our throw-away society taught him a lot. He knew he could find these windows and door for a fraction of the cost if he used the resources he knew so well. Countless times he was tasked with removing and replacing home furnishings because “the nickel-plated faucet didn’t match the chrome door handles”, because “the stainless steel kitchen sink didn’t match the mudroom sink”, because “the light fixture in the kitchen was too red”, because “the counter top wasn’t the right type of granite”…the list goes on. He headed out on a mission to scour the second-used building supply stores in the greater Seattle area.
Habitat for Humanity Store, Second Used and Earthwise all have an amazing inventory of building supplies and are practically a stones throw away from each other. He found as close as possible to the sizes for what he thought would work for the layout of the tiny home. These initial modifications to the original plans were just the beginning.
He then found a local company, Premier SIPs based out of Puyallup, Washington, that he hired to make the SIPs (this is awesome because shipping costs associated with ordering custom SIPs range greatly depending on where they are shipped from). The SIPs were shipped to the boatyard without one smashed corner, neatly labeled with numbers (reminiscent of old ‘paint-by-number’ coloring books), and supplied with special screws, glue and tape.
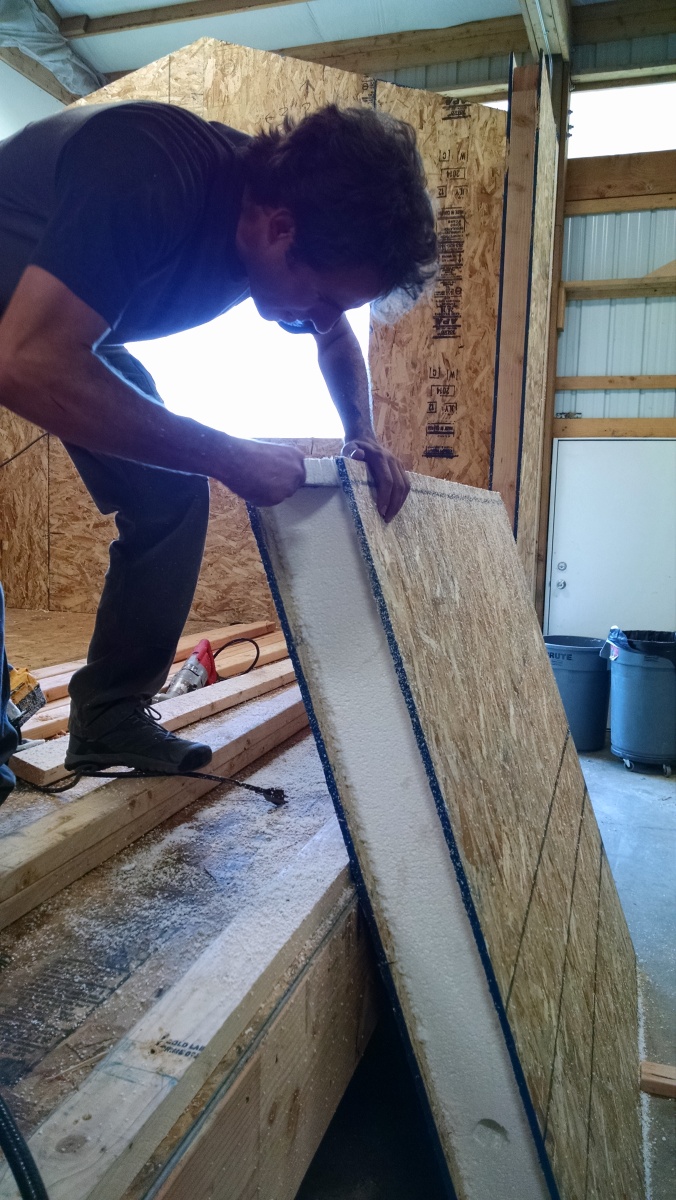
One small ‘oversight’…was that we did not realize these SIPs needed “dimensional lumber”. If you’re like me, you might think what the hell is “dimensional” lumber? Dimensional lumber is the studs of stick framing. The SIPs use dimensional lumber to connect the panels to each other. In the photo above you can see the pre-cut sort of channels or pockets where a 2″ x 4″ is glued and screwed to the OSB part of the SIP.
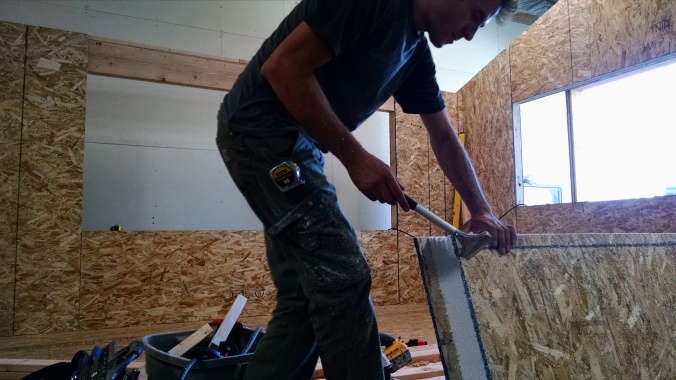
In the photo directly below you can see Kalib chiseling out parts of the roof SIPs, allowing him to elevate the ceiling beam, burying it slightly so it wouldn’t protrude down into the ceiling head space. The original Minim Tiny House plans were designed so that the beam would be flush with the ceiling, but during the plan modification process to accommodate the reclaimed windows, the ceiling beam location was a little different and wasn’t caught until the SIPs were already made and on-site. Luckily Kalib knew just how to correct it.
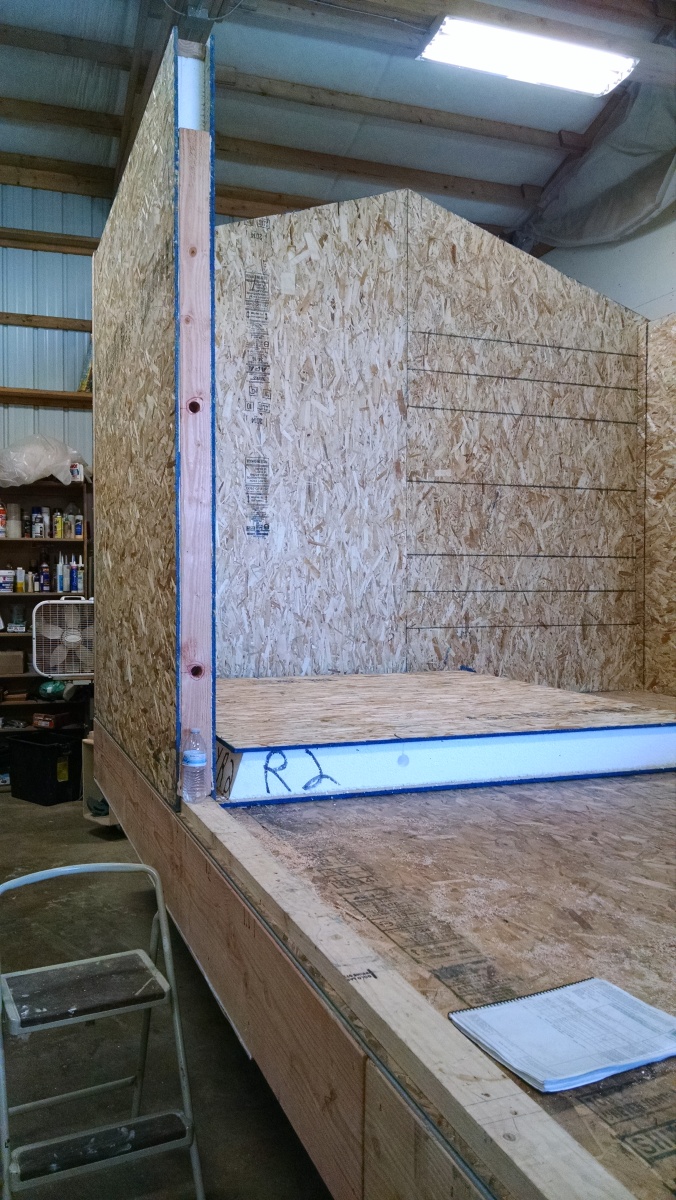
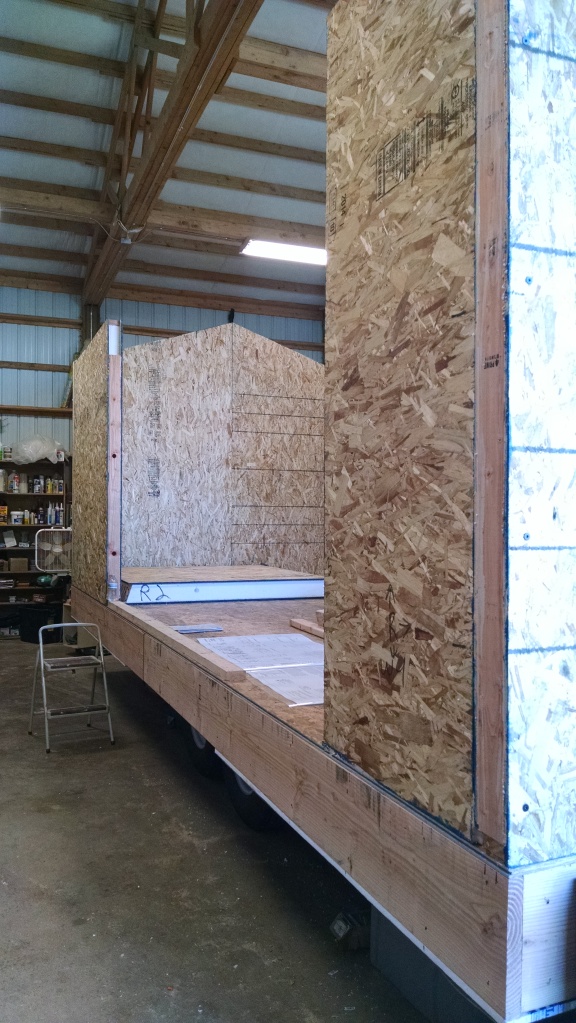
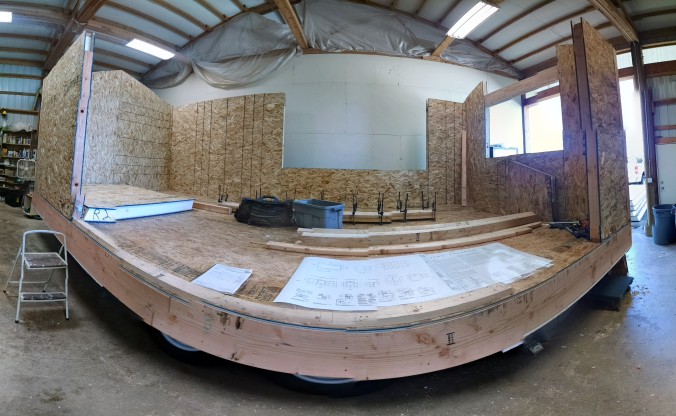
The actual installment of the SIPs was a two weekend process. The first weekend was devoted to placing all the wall panels. Similar to how panels are joined to each other, the panels are also secured to a “track” built around the perimeter of the tiny house out of 2×4’s. You will definitely still want to “balance” them upright while you are securing them to each other and the base, but the snug fit over the track makes it tempting not to. Special thanks to Kalib’s boss, Nathie Katzoff (owner and designer for NK Woodworking) and his wife Lauren for their help setting many of the SIPs.

It’s so interesting to know the difference between traditional stud framing and using the SIP’s in this type of application. Added to the well insulated floor, this emphasizes a theme for your project in energy usage warmth factor. I won’t correct your spelling of lumber if you keep showing plenty of pictures of Kalib and that dog! :-). Good job!
LikeLike
I think I spelled it wrong 8 out of 9 times…points for consistency 😉
LikeLike
Looking good. It must be exciting to actually see walls and a shape now.
LikeLiked by 1 person